Ultimate Guide to DIY Spray Foam Insulation: Everything You Need to Know
Spray foam insulation is becoming increasingly popular among homeowners looking for an effective and energy-efficient solution to insulate their homes. Whether you’re trying to reduce energy bills, eliminate drafts, or improve soundproofing, DIY spray foam insulation offers an affordable option to tackle these issues yourself. In this guide, we’ll explore everything you need to know about DIY spray foam insulation, including the benefits, challenges, and how to apply it properly.
What is DIY Spray Foam Insulation?
DIY spray foam insulation is a type of insulation that expands when applied, filling gaps, cracks, and spaces in your home’s walls, ceilings, and floors. It is typically made from two components: isocyanate and polyol resin, which react when combined to create a foam that expands and hardens. This foam helps to reduce heat transfer, prevent air leakage, and enhance the overall energy efficiency of your home.
There are two types of spray foam insulation:
- Open-cell foam: Light and flexible, it expands to fill cavities but offers a lower R-value (thermal resistance) compared to closed-cell foam.
- Closed-cell foam: Dense and rigid, it provides a higher R-value and acts as both a vapor and air barrier, which makes it suitable for areas prone to moisture.
Why Choose DIY Spray Foam Insulation?
Many homeowners are drawn to DIY spray foam insulation because of its numerous benefits. Here are the top reasons to consider this option:
1. Improved Energy Efficiency
One of the most significant advantages of spray foam insulation is its ability to seal air leaks and gaps. When properly applied, spray foam can help maintain a consistent indoor temperature, reducing the need for heating and cooling systems. This can lead to significant savings on your energy bills over time.
2. Easy Application
DIY spray foam insulation kits come with everything you need to get started, including foam, hoses, spray guns, and nozzles. With the right tools and safety precautions, you can apply spray foam insulation yourself without needing professional assistance.
3. Soundproofing
Spray foam insulation is effective at blocking sound transmission between rooms. If you live in a noisy environment or want to create a quieter space, open-cell foam can reduce the amount of noise that passes through walls, ceilings, and floors.
4. Moisture Control
Closed-cell foam, in particular, acts as a moisture barrier, helping to prevent mold and mildew growth in damp areas like basements, attics, or crawl spaces. This makes it an excellent choice for homes located in humid or wet climates.
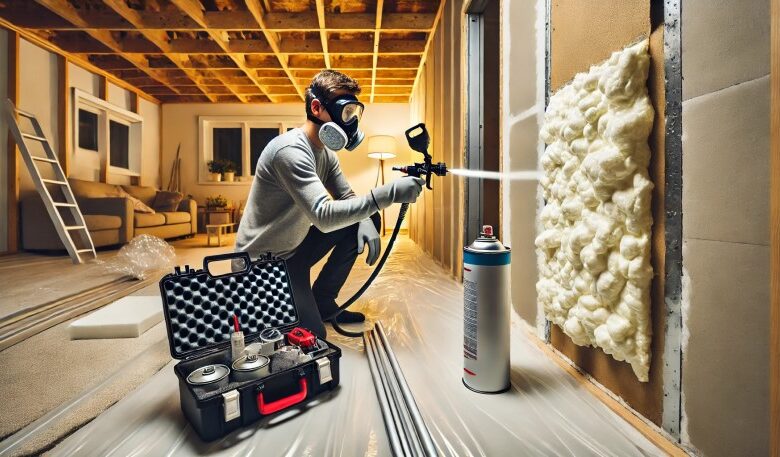
How to Apply DIY Spray Foam Insulation
Applying spray foam insulation can be a straightforward process, but it requires careful preparation and attention to detail. Below are the steps involved in a successful DIY spray foam insulation project.
Step 1: Prepare the Area
Before you start spraying foam, it’s essential to prepare the area where you’ll be working. Remove any debris, dirt, or old insulation materials from the surfaces to ensure the spray foam adheres properly. It’s also crucial to protect nearby surfaces that you don’t want to cover in foam, such as floors, windows, and furniture, by covering them with plastic sheets or tarps.
Step 2: Gather the Necessary Tools and Materials
To complete your DIY spray foam insulation project, you’ll need a spray foam insulation kit. These kits usually contain:
- Spray foam cans or containers
- Applicator gun or nozzle
- Mixing nozzles (if needed)
- Protective gear such as gloves, goggles, and a respirator mask
- Drop cloths and plastic sheeting for surface protection
Step 3: Wear Proper Safety Gear
Spray foam insulation involves chemicals that can be harmful if inhaled or if they come in contact with your skin or eyes. Always wear the appropriate protective gear, including gloves, goggles, and a respirator mask, to ensure your safety during the application process.
Step 4: Start Spraying the Foam
Once you’ve prepared the area and put on the proper safety gear, you can begin applying the spray foam. If you are using a DIY spray foam insulation kit, follow the manufacturer’s instructions for mixing and applying the foam. Make sure to spray in a smooth, even motion, filling any gaps and cracks without over-applying the foam.
Step 5: Allow Foam to Cure
After applying the foam, give it time to cure and expand. Depending on the product, this can take anywhere from a few hours to a full day. It’s essential not to disturb the foam during this curing period to ensure it fully hardens and forms an effective barrier.
Step 6: Trim Excess Foam
Once the foam has fully cured, you can trim any excess foam that has expanded beyond the surface using a utility knife. Be sure to trim the foam flush with the wall or ceiling for a neat finish.
Advantages and Disadvantages of DIY Spray Foam Insulation
Advantages
- Cost-Effective: DIY spray foam insulation is typically more affordable than hiring a professional insulation contractor.
- Quick Installation: With the right tools, you can complete a DIY insulation project in a few hours to a day, depending on the size of the area.
- Versatility: Spray foam insulation can be applied to various surfaces and hard-to-reach areas where traditional insulation materials may be challenging to use.
Disadvantages
- Health and Safety Risks: Exposure to the chemicals in spray foam can cause respiratory issues, skin irritation, and eye discomfort. This is why protective gear and proper ventilation are essential during application.
- Difficulty in Application: Achieving a smooth, uniform layer of foam can be challenging for beginners, especially in tight spaces or large areas. Over-applied foam can also result in waste and uneven insulation.
- Limited Coverage: DIY spray foam insulation kits are designed for smaller projects, so they may not be cost-effective for larger homes or commercial spaces.
Tips for Success
- Start Small: If this is your first time using spray foam insulation, it’s a good idea to start with a small area to get comfortable with the process.
- Ventilate the Area: Ensure proper ventilation in the room where you’re working to prevent inhaling fumes from the foam.
- Test the Foam: Before applying it to large areas, test the foam on a small section to check for proper expansion and adhesion.
If you’re looking to purchase a kit, there are many available options online, such as those available on popular platforms like Amazon, where you can browse a variety of DIY spray foam insulation kits to suit your specific needs.
Conclusion
DIY spray foam insulation can be a game-changer for homeowners looking to improve their home’s energy efficiency, reduce noise, and control moisture. While the process requires attention to detail and safety precautions, the benefits make it a worthwhile investment for those willing to tackle the task themselves. By following the proper steps and using the right materials, you can achieve professional-quality insulation in your home without the high costs of hiring an expert.
If you’re looking to get started on your spray foam insulation project, you can find a variety of DIY spray foam insulation kits online to help you with your home improvement needs.