Professional Filmmaking on a Budget: Accessing Cinema-Quality Equipment
You don’t need a Hollywood budget to make something that looks like it belongs on the big screen. Plenty of indie filmmakers, YouTube creators, and small production teams are proving every day that it’s possible to produce jaw-dropping visuals with a fraction of the resources big studios have.
So, if you’ve ever watched a beautifully lit scene or a slick tracking shot and thought, “I could never pull that off without a massive crew,” you might be surprised at how accessible those techniques are.
With a bit of technical know-how, some resourcefulness, and a clear plan, you can get your hands on cinema-quality equipment, use it to its fullest, and create work that doesn’t just look professional – it feels professional. The trick is knowing where to invest and where to improvise without losing quality.
Skip Buying, Start Renting
Dropping tens of thousands on a cinema camera isn’t realistic for most indie filmmakers, and honestly, it’s not necessary.
Renting means you can work with the same cameras used on commercials and streaming shows for a few days at a fraction of the cost. It also gives you the freedom to choose the right tool for each project instead of being stuck with the one you own.
Something like a Sony FX3 rental gives you beautiful 4K images, excellent low-light performance, and a lightweight build that works just as well on a tripod as it does on a gimbal. Plus, you can pair it with different lenses and rigs depending on the style you’re going for.
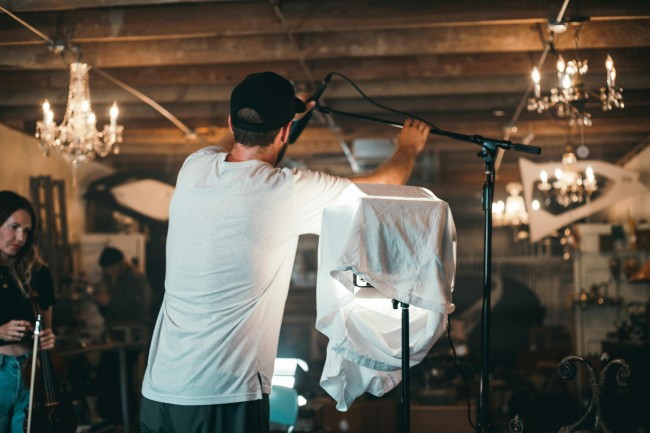
Light Smart, Not Expensive
Lighting can make the difference between “student film” and “professional shoot” faster than almost anything else. The good news? You don’t need a truck full of high-end lights to get a great look. For outdoor shoots, plan around golden hour so you get that soft, cinematic glow for free.
Indoors, a couple of LED panels and a few DIY reflectors (even a white foam board) can do wonders. The goal is to shape the light so it flatters your subject and keeps shadows under control. If you end up with unwanted shadows in your final shots, AI tools now make it surprisingly easy to remove shadows without wrecking the overall image.
Choose Lenses Like You’re Building a Toolbox
Your lens choice shapes the whole feel of a scene. Zoom lenses are flexible, but prime lenses often give you sharper, more cinematic results and can handle low-light scenes better.
If you’re going for something stylised, a wide, sweeping anamorphic look, or extreme macro detail, it’s cheaper to rent those specialty lenses for a few days rather than buy them outright. And if you have lens adaptors, you can mix and match glass from different camera systems, which gives you more creative options without having to own everything yourself.
Don’t Neglect Sound
You can have the most beautiful footage in the world, but if the sound is bad, people will switch off. Clear audio doesn’t require a full studio setup – just the right tools and a little attention.
A shotgun mic on a boom will give you clean dialogue in most setups, while a lav mic clipped to your talent is great for noisy environments.
Always listen through good headphones while you’re recording so you can catch problems right away. If there’s background noise you can’t avoid, budget-friendly software can clean it up later and make everything sound crisp.
Play With Nostalgic Looks
Audiences love a visual style that feels familiar, especially when it taps into something emotional. That’s why you see so many productions using vintage lenses, film grain overlays, or color grades that mimic older stock.
These touches can add mood and depth without needing expensive set pieces. Knowing how nostalgia in modern entertainment affects audience connection can help you decide whether a warm, retro feel will make your project stand out.
Plan Your Post-Work Before You Shoot
A lot of budgets get blown in post-production because things weren’t planned early enough. Decide on your editing software and file formats before you start shooting so you’re not stuck with hours of footage in the wrong settings.
Label your files clearly as you go. Future-you will thank you. If you’re adding visual effects, check with your VFX person in advance so you capture shots in a way that makes their job easier.
You can also save money by outsourcing certain tasks, like motion graphics or sound mixing, to freelancers rather than keeping them all in-house.
Lean on Your Local Network
Some of the best resources for indie productions come from the community around you. Film students are often eager to get hands-on experience, and many are skilled enough to step into crew roles right away.
Local businesses might offer you locations, props, or wardrobe in exchange for a credit or a social media shoutout.
Arts organisations sometimes provide grants or even free equipment loans. Mixing community support with smart use of technology can give small productions the kind of polish people expect from major studios.