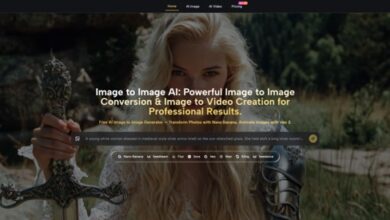
The New Era of Visual Storytelling: How to Master Image Creation with Professional Tools
When you are trying to launch a new project or spruce up a website, the biggest hurdle is usually the visuals. Most people find themselves stuck between two bad options: spending thousands of dollars on a professional photographer or settling for cheesy stock photos that everyone has seen a million times. It’s frustrating when you have a clear vision in your head but no way to put it on paper or screen. However, things are changing.
Now, there are tools that let you skip the middleman and create exactly what you need just by describing it. By using a smart system that understands plain English, you can turn a simple thought into a high-end image that looks like it came straight out of a premium studio. This isn’t just about making pictures; it’s about having the freedom to tell your story without being limited by your budget or your drawing skills.
Why Generic Photos Are Killing Your Project’s Vibe
In a space where everyone is fighting for attention, the quality of your images acts as your first impression. If your visuals look cheap or generic, people will assume your work is too. Moving away from standard templates is the first step toward building something that actually sticks in people’s minds.
1. The Problem with Common Stock Libraries
Most free photo sites are full of staged, awkward pictures that don’t quite fit your message. When you use Banana Pro, you stop searching for “close enough” and start making exactly what you see in your head. It’s about having total control over every detail in the frame, from the colors to the specific objects in the background.
2. Saving Time on Manual Editing
In the past, if you wanted to change one small thing in a photo, you had to spend hours in complicated software. Now, the process is much faster. You can tweak things on the fly without needing to be a tech wizard. This allows you to spend more time on your actual business and less time clicking around in a photo editor.
3. Making Your Ideas Look Real
The goal isn’t just to make a “cool” image; it’s to make something that looks believable. Whether it’s for a small business or a personal blog, having high-end visuals makes your whole project look more trustworthy. When the lighting and textures look right, it builds a sense of quality that generic icons just can’t match.
Getting the Most Out of Nano Banana Prompts
The secret to a great result isn’t just the tool itself, but how you talk to it. The Nano Banana Prompts system is built to be smart enough to understand plain English, so you don’t have to learn a new “code” language to get what you want.
1. Talking to the Tool Like a Human
You don’t need to use weird technical jargon. If you want a sunny room with wooden floors and a cozy feel, just say that. The Nano Banana Prompts setup is designed to pick up on those small details and turn them into a clear, sharp picture that matches your mood.
2. Getting the Text Right Every Time
One of the biggest headaches with older tools was that they couldn’t handle words inside images. This system handles letters and signs much better. If you need a shop sign, a book cover, or a specific label, the text comes out looking clean and easy to read, which is a huge plus for marketing.
3. Avoiding the “Messy” Look
Cheap generators often make mistakes with small details like fingers or weird shadows. By using these specific prompts, you get a much cleaner output. The images look like they were shot on a real camera or drawn by a real person, not just mashed together by a machine.
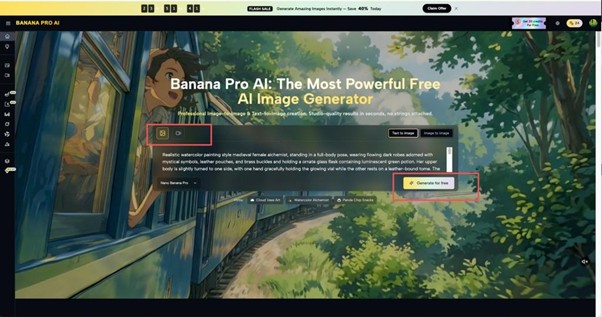
Simple Ways to Use the Image Creator
If you head over to the Banana Pro Image page, you’ll see that the layout is pretty straightforward. You don’t have to click through a dozen menus to find what you need; the tools are right there where you can see them.
1. From Words to Finished Art
The most common way to use it is by typing a description. You describe the scene—the colors, the lighting, the objects—and the tool builds it for you. It’s perfect for when you have a great idea but don’t have the technical skills to draw it out yourself.
2. Changing Styles with One Click
You can take a simple concept and try it out in different ways. Maybe one version looks like an oil painting, and another looks like a modern photograph. This lets you see which style fits your project best without having to start the whole process over from scratch.
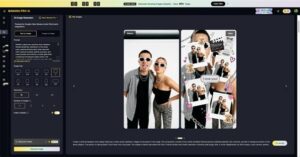
3. Using Photos You Already Have
You can also upload a picture you already like and use Banana Prompts to change parts of it. This is great for fixing a photo that’s almost perfect but needs a little something extra, like a different background or better lighting for the subject.
Making Your Brand Look Consistent
When people see your work, they should know it’s yours. Keeping a consistent look across your website and social media is key to building a real brand identity.
1. Creating a Signature Style
By using similar words and settings in your prompts, you can make sure all your images feel like they belong together. This makes your social media feed or your website look way more professional and organized, rather than a random collection of photos.
2. Content for Every Occasion
Whether you need a banner for a holiday sale, a small icon for an app, or a big hero image for a landing page, you can make them all in one place. It’s like having a full-time designer ready to work whenever you have a new idea.
3. Testing Ideas Before You Commit
If you aren’t sure which direction to go, you can use the tool to make a few different versions. This helps you decide on a color scheme or a “vibe” before you spend any money on physical products or expensive advertising campaigns.
Why the Nano Banana Model is Different
Under the hood, there is a lot of heavy lifting going on, but the user experience remains simple. The Nano Banana model is built to be reliable so that you don’t waste time on bad results.
1. Real-Life Lighting and Textures
The model knows how sunlight should hit a window or how soft wool should look. These tiny details are what make an image look expensive. It’s not just a flat drawing; it has depth and feeling that captures the viewer’s eye.
2. Fits Any Screen Size
You can choose the shape of your image. If you need a tall photo for a phone screen or a wide one for a computer, the tool adjusts the composition so nothing looks squashed. This ensures your art looks great no matter where it’s posted.
3. It Learns from Your Feedback
The more you use it, the easier it gets to find your groove. The interface is built for a back-and-forth process, so you can keep refining the image until it’s exactly what you need for your specific project.
Pro Tips for Better Results
Even though the tool is easy, a few simple tricks can make your results go from “good” to “amazing” in just a few seconds.
1. Focus on the Main Subject First
Start your prompt by clearly stating the most important thing in the picture. If it’s a cup of coffee, put that first. Then add the background and the lighting. It helps the tool stay focused on what really matters in the scene.
2. Use Simple Descriptive Words
Instead of using big, fancy words, stick to things like “bright,” “dark,” “fuzzy,” or “shiny.” These simple words are very effective at telling the model exactly what kind of texture or light you are looking for without causing confusion.
3. Don’t Be Afraid to Try Again
Sometimes the second or third try is where the magic happens. Since it only takes a few seconds to generate a new version, you can afford to experiment with different words and see how they change the final result.
Conclusion
Creating great visuals is now easier than ever. You don’t need a fancy camera or years of training to make your ideas look professional. With tools like these, the only thing that matters is your imagination. Whether you’re working on a small project or a big business, having custom images on demand is a total game-changer. It’s time to stop settling for average photos and start making something that truly stands out.