How to Put Tile Stickers on Your Old Tiles to Make Them More Modern
Updating your home doesn’t always require a full-scale renovation. One of the quickest, easiest, and most affordable ways to breathe new life into outdated tiles is by using tile stickers. These self-adhesive wonders can instantly transform your bathroom, kitchen, or laundry area into a fresh, modern space—without the dust, mess, or high cost of traditional tiling.
Whether you’re renting and need a removable solution, or you simply want a low-effort facelift for your interiors, tile stickers are a game-changer. Here’s a step-by-step guide to help you put them on your old tiles for a sleek, stylish look.
Why Choose Tile Stickers?
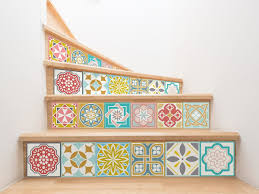
Tile stickers are thin, durable sheets made of vinyl or similar materials, printed with decorative patterns. They’re waterproof, heat-resistant (depending on the brand), and easy to clean. You can find them in countless designs—from minimalist marble to bold Moroccan prints—making it simple to match any interior style.
The benefits are clear:
- Budget-friendly:Much cheaper than replacing tiles.
- Quick installation:No need for grout, glue, or specialized tools.
- Low mess:No demolition, dust, or debris.
- Reversible:Many types can be removed without damaging the surface beneath.
Step-by-Step Guide to Applying Tile Stickers
Step 1: Choose the Right Stickers
Measure your existing tiles carefully—both height and width—and buy stickers that match those dimensions. Many tile stickers are designed to fit standard sizes like 4×4 inches, 6×6 inches, or 8×8 inches, but custom sizes are also available.
Tip: Always buy a few extra stickers in case of mistakes or future replacements.
Step 2: Prepare the Surface
The key to a smooth, bubble-free finish is proper preparation.
- Clean thoroughly:Use warm soapy water or a degreasing cleaner to remove dirt, grime, and grease.
- Dry completely:Any moisture will prevent the adhesive from sticking well.
- Smooth out imperfections:If your tiles have chips or cracks, fill them with filler and sand lightly.
Step 3: Test First
Before applying stickers across the whole area, test one tile to see how it adheres and looks under your lighting. This step ensures you’re happy with the texture, finish, and fit.
Step 4: Apply the Stickers
- Peel carefully:Remove the backing paper from the sticker without touching the adhesive too much.
- Align perfectly:Position the sticker over the tile, making sure edges and corners line up exactly.
- Press and smooth:Use a squeegee, credit card, or clean cloth to smooth out air bubbles from the center outward.
- Repeat:Continue across the surface, working slowly for accuracy.
Step 5: Deal with Grout Lines
Most stickers are designed to cover the tile surface only, not the grout lines. If you want a seamless look, choose larger stickers that overlap or consider painting grout lines to match the sticker background color.
Step 6: Trim Where Necessary
In corners, around sockets, or near edges, you might need to trim stickers. Use a sharp craft knife and a ruler for clean cuts.
Step 7: Care and Maintenance
To keep your tile stickers looking new:
- Avoid abrasive sponges or harsh chemicals.
- Wipe with a damp cloth or mild cleaner.
- Prevent prolonged exposure to direct heat (e.g., near stovetops, unless the stickers are heat-resistant).
Design Tips for a Modern Look
- Go Monochrome for Minimalism
Black, white, or grey tones create a sleek, timeless aesthetic. Pair with matte finishes and simple fixtures for a chic, modern look. - Try Geometric Patterns
Bold hexagons, chevrons, or diamond prints can make a strong style statement, especially in small areas like splashbacks. - Mimic Natural Materials
Marble, stone, or wood-effect stickers can bring elegance without the high price tag or maintenance needs. - Mix and Match
Create a feature wall by mixing patterned and plain stickers, or alternate between different colors for a playful vibe.
Common Mistakes to Avoid
- Not cleaning tiles properly:Dirt or grease will prevent adhesion.
- Skipping measurements:Even a few millimeters off can ruin the look.
- Rushing the application:Take your time to avoid bubbles and crooked placement.
- Using in the wrong environment:Some stickers aren’t suitable for very wet areas like inside showers—always check the product specs.
Final Thoughts
Tile stickers are proof that you don’t have to spend thousands or commit to a full renovation to get a modern, stylish space. With careful preparation, precise application, and a bit of creativity, you can completely change the mood of your bathroom, kitchen, or laundry in just a few hours.
Whether you opt for bold patterns or subtle textures, the transformation will feel like a brand-new room. And the best part? If you ever want to change the style again, you can simply peel off the stickers and start fresh.
So, grab your favorite design, roll up your sleeves, and give your old tiles the makeover they deserve. It’s affordable, fast, and—most importantly—fun.
If you love home makeovers and want to take your passion a step further, why not dream big? Some people have actually managed to win a house through exciting instant win competitions and creative house competitions. Imagine transforming not just your tiles, but an entire home that could be yours!