3D Printed Robot Arm: A Complete Guide for Beginners
Robots are becoming a massive part of our lives. They help with factories, hospitals, houses, and plenty of other places. A critical part of a robot is its arm. Robot weapons assist in plundering the robots, transferring them, and doing many things.
Today, it is straightforward to make robot guns because of new techniques along with 3D printing.
In this guide, we will explain how a 3D-printed robot arm is made. We will also compare it with other methods, like injection molding for robotics. This article is for beginners who want to learn how robot arms are made using these new tools.
What Is a Robot Arm?
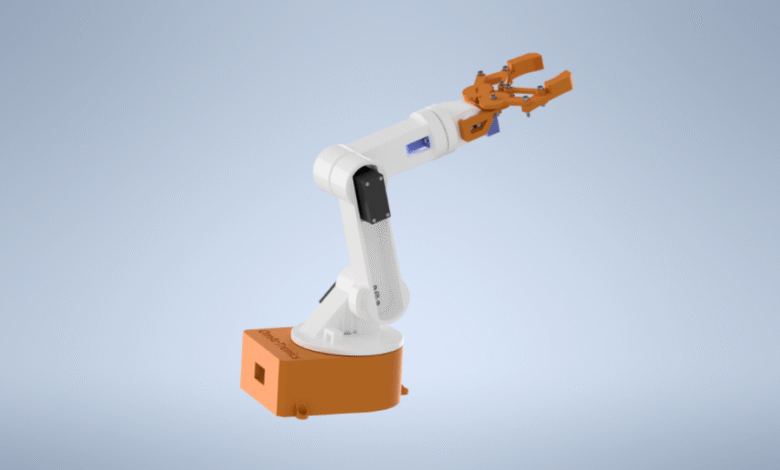
A robot arm is a mechanical part that moves like a human arm. It usually has joints, fingers, and motors to help it move. Robot arms are used to:
- Pick and place objects
- Assemble parts in factories
- Perform surgeries in hospitals
- Help in research and education
Making a strong and precise robot arm is very important.
What Is 3D Printing?
It is a way to create item layers in a three-dimensional printing group. You start with a virtual design, and the 3D printer forms the segment by adding thin layers of the fabric. This approach can create a very huge and sturdy element without the use of mildew.
One advanced type is MJF 3D printing (Multi Jet Fusion). It uses powder material and prints parts quickly and with good strength. Many companies use MJF 3D printing to make robot parts, including arms.
Why Use 3D Printing for Robot Arms?
3D printing is great for robot arms because:
- You can make complex shapes easily
- It allows fast prototyping and testing
- You don’t need expensive molds or tools
- It can produce lightweight parts
- You can customize each part exactly
This makes 3D printing perfect for creating robot arms that are very strong, light, and made just right.
How Is a 3D Printed Robot Arm Made?
Here are the simple steps:
1. Design
Engineers use special software to design the robot arm parts. The design includes the shape, size, and where the joints and motors will go.
2. Print
The design file is sent to the 3D printer. Using MJF 3D printing, the machine builds the part layer by layer with powder material. It creates a strong and accurate part.
3. Clean and Finish
After printing, components are cleaned to remove extra powder. Sometimes they are polished or painted for a higher feeling and power.
- Collect
The published parts are located collectively with engines, wires, and manage to make a full robot arm.
The advantages of three-dimensional-revealed robotic weapons
Speed: You can create components fast, which allows quick testing and improving the layout.
Cost: It is less expensive for small parties and prototypes due to the fact that there is no shape or form.
Adaptation: You can make robot weapons that meet special necessities.
Lightweight: 3D printing can build complex parts to a shop weight.
Innovation: You can strive for new ideas that might be tough to create with other techniques.
What About Injection Molding for Robotics?
Another popular way to make robot arms is through injection molding for robotics. This process pushes molten plastic into a mold to create parts. It is very good for making many identical parts quickly.
When is Injection Molding Best?
- When you need large quantities of robot arm parts
- When parts need to be very strong and smooth
- When the design is final and won’t change often
- When you want a low cost per part for mass production
Injection molding works great when the robot arm design is stable, and you want to produce many parts fast.
3D Printing vs Injection Molding for Robot Arms
Function 3-D printing (MJF) Injection casting cost (small batch low (because of mold charges) Cost (massive batch) high low in keeping with element design Flexibility Flexibility Very fast very low pace (need to make form) for a very speedy gradual prototype
Which One Should You Choose?
Use the MJF 3D print if you make any robot guns or prototypes. This facilitates you to check new thoughts faster and maintain prices low.
Use injection casting for robotics if you want more than one robotic gun or parts, with an excellent finish and strong, first-rate quality.
Both techniques are beneficial and often work collectively. For instance, you can first create a part with 3D printing. When the design is obvious, switch to injection casting for mass manufacturing.
What Materials Are Used in 3D-Printed Robot Arms?
Regular materials consist of:
Nylon: sturdy and bendy
Polymid: mild and durable
Glass complete of nylon: Extra strong and heat resistant
These materials offer robotic guns strength and versatility.
What Materials Are Used in Injection Molding?
Usually, robust plastic is used, including ABS, polycarbonate, or polypropylene. These materials are durable and can be shaped with high precision.
Final Tips for Beginners
If you want to analyze or create a prototype robot arm quickly, you can begin with a 3-D print.
Work on a very good MJF 3-D print provider to get a sturdy and accurate element.
If your layout is prepared for mass production, talk to experts on injection casting for robotics.
Always take a look at your robotic arm components to make certain they circulate properly and are sturdy.
When using 3D printing, preserve the design bendy and open to adjustments.
Conclusion
It is straightforward to make a robot arm nowadays due to new technology, including 3D printing and injection casting. For novices, the MJF 3D print offers a short and bendy manner of making components with superb expansion and strength.
When you need more elements, injection casting for robotics offers you a sturdy and easy robotic weapon at low prices.
By knowing these strategies, you could choose an excellent way to make the robotic arm. It facilitates you to store money, time, and make better robots.